I’ve been wanting a headboard for quite some time for my place but I didn’t want to spend $300+ on a headboard.
I wanted a rustic looking headboard as I’ve always liked that style. We went to a reclaimed wood place on the river but they wouldn’t be able to cut us any wood for at least 4 weeks. So that option was out of the question, off to Home Depot we went…
I wanted to do it fairly inexpensively but didn’t want it to look too cheap. We decided to pick out some pieces of pine as it has character. If you are on a smaller budget you could use just plain 2×4’s or 2×6’s. We decided on 5 pieces, cause I wanted it to be able to see it over my pillows and also take up some wall space.
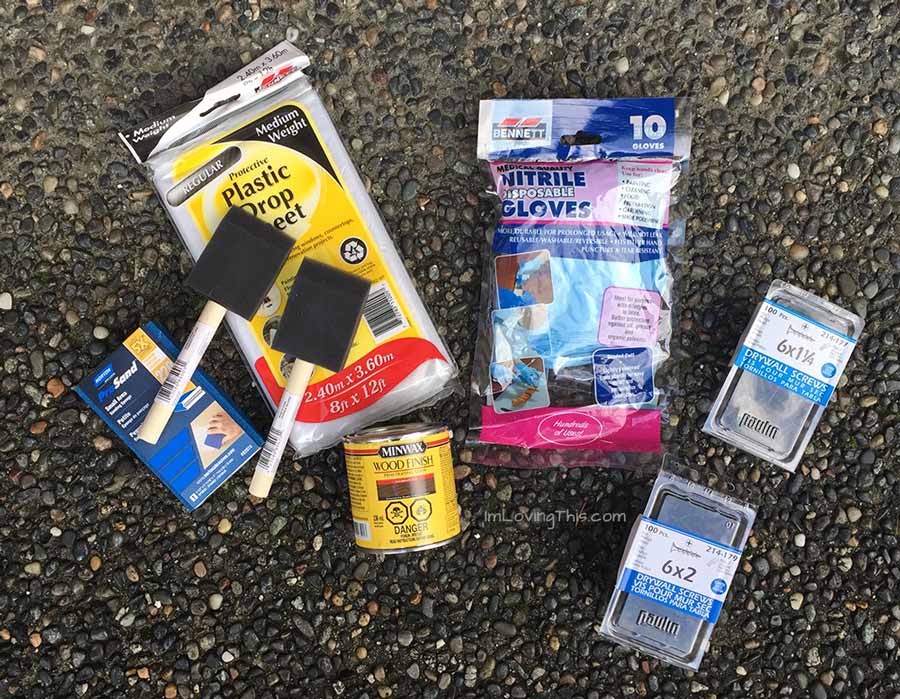
We also picked up a plastic drop sheet to cover the garage floor, some screws, sanding sponge, gloves and two foam brushes. I had to buy two huge boxes of screws cause I didn’t have any but you might have some on hand that you can use.
I had to decide on a stain for the wood and went with Minwax Wood Finish in Jacobean. I think the colour worked out beautifully, and glad my boyfriend suggested the colour to me.
DIY Headboard Supply List
5 – 1 x 6 x 6 – pine – $4.61 each – $23.05 total
2 – 1 x 3 x 8 – framing wood – $2.48 each – $4.96
1 qt can of the stain of your choice (I used Minwax Wood Finish Jacobean) – $8.57
1 – 2″ foam brush – $0.98
1 – Sanding sponge, extra fine 220 – $3.97
20 – 6 x 1-1/4 drywall screws – $3.09 for a box of 100 – $0.62 total
2 – 4 6 x 2 drywall screws (optional if you want to screw it into your wall) – $4.98 box of 100 – $0.10 total
gloves (optional but recommended) – $2.77 for package of 10 – $0.55 for two
1 – plastic drop sheet (optional but recommended) – $2.77
an old rag
$45.57 CAD total used in supplies
How we built the rustic headboard
We were building the headboard for a queen bed, so make sure to measure according to your mattress.
First we cut the 6 footers of pine down to 5 1/2 feet. We made them hang a few inches over both sides of the bed.
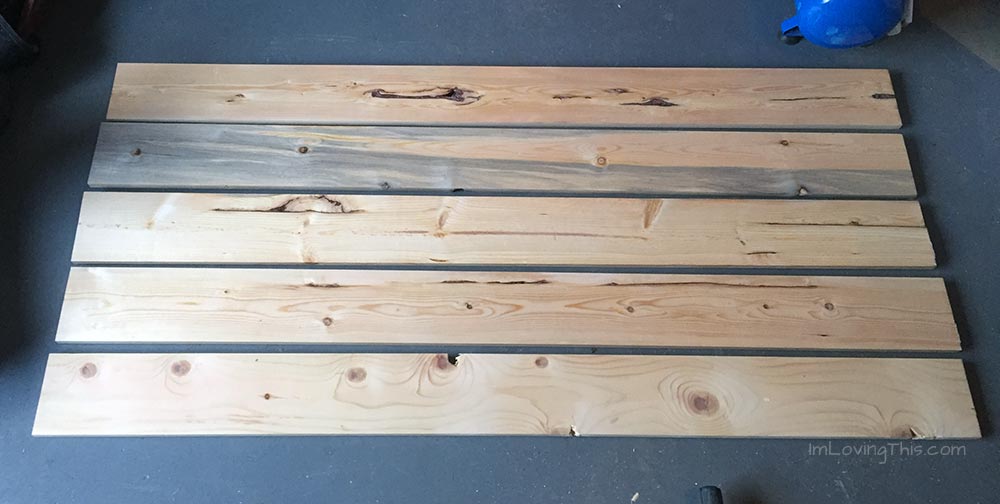
Next we sanded the two edges of each piece slightly just to smooth them out. Don’t over sand as you want it to look rustic, not fabricated in a factory.
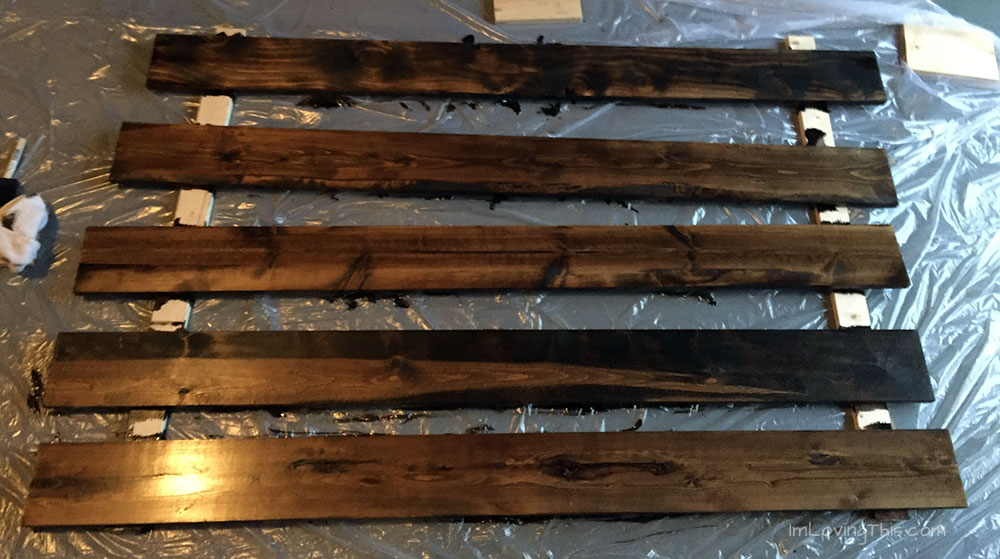
We then put the chopped off pieces onto the floor and laid the pieces of pine across them so we could stain them. It is easier to stain the edges when they are propped up on the floor.
We took the stain and brushed one coat onto the pine wood with the foam brush.
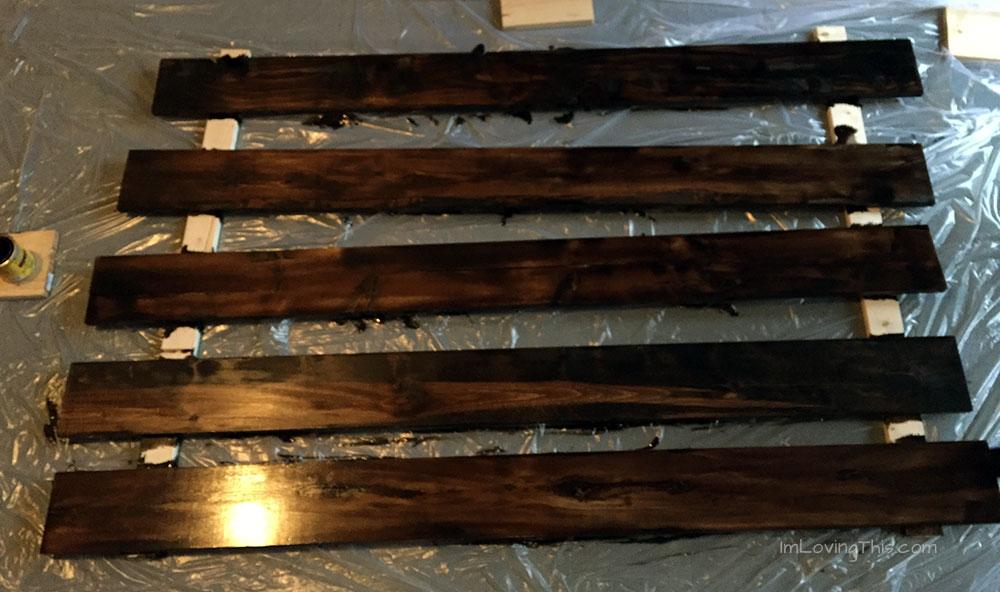
Then we wiped it off with a old rag. Sorry the pictures are crap the lighting was horrible in the garage and it was raining outside.
After that we waited for it to dry completely. It actually took a few days because it was so damp, I was so anxious to put it together.
Once it was dry, it was time to sand. I let my boyfriend do most of the work as he knows what I like and is good at this kinda of stuff. He sanded down the edges of the wood to give it a ‘worn’ look. He also did the edges, length wise, just slightly. Continue sanding until you get your desired looked.
Once we were done sanding we turned the pieces over to the back side to mount them together. 😀
We had to cut down the 1 x 3 x 8’s to our desired height which was around 5 feet. You have to figure out how high you want it in order to make the cuts. Each headboard will have different measurements depending on the bed. I wanted the headboard to start right above my mattress.
Once you cut down the “stand” pieces it’s time to start screwing. We screwed in from the back so no screws would show. We put in 4 screws per plank for a total of 20. I wanted a slight gap in between each piece of wood. To measure the gaps between each piece we used the handle of the foam brush. It worked perfectly.

Now that the headboard is complete it’s time to mount it to the wall. This part is optional. You could also mount it to your bed frame. We just screwed in one screw on each supporting piece into the wall with the 6 x 2 drywall screws. You could do four if you want but two worked for me. You can always add more later. Less holes in the wall, the better.
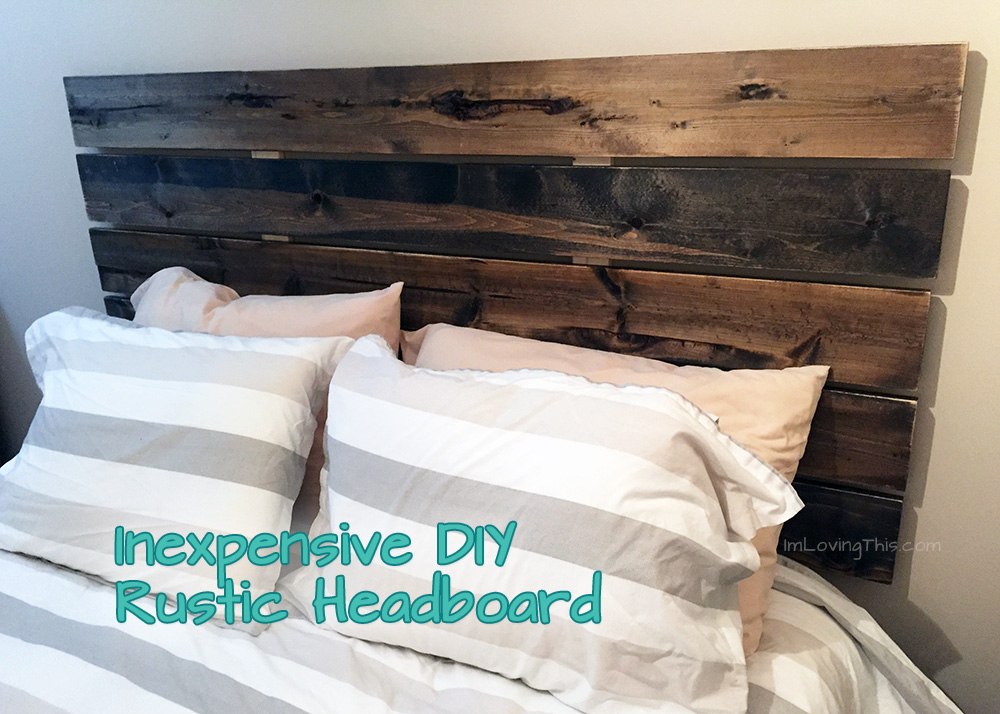
I was so happy with my headboard! It was quite easy to make and inexpensive. I’ve seen headboards of a similar style for $200-$300. No one can tell that we made my headboard for under $50. I’m absolutely in love with it! 😀
Now time to upgrade the linens…
Want to do it for less? There are several ways you could make this project even more inexpensive
Ways to make the project less expensive
- Purchase only the screws you require. I bought 2 boxes of 100 when my project only required 22 screws.
- Use different wood such as standard 2 x 4’s or 2 x 6’s.
- Use one less plank of wood for a total of 4
- Don’t stain your wood, or use stain you have on hand.
Here is the supply list for the headboard again for you without the pricing breakdown.
- 5 – 1 x 6 x 6 – pine
- 2 – 1 x 3 x 8 – framing wood
- 1 qt can of the stain of your choice (I used Minwax Wood Finish Jacobean)
- 1 – 2″ foam brush
- 1 – Sanding sponge, extra fine 220
- 20 – 6 x 1-1/4 drywall screws
- 2 – 4 6 x 2 drywall screws (optional if you want to screw it into your wall)
- gloves (optional but recommended) – $2.77 for package of 10 – $0.55 for two
- 1 – plastic drop sheet (optional but recommended) – $2.77
- an old rag
If you re-create this headboard make sure to tweet me, post it on my Facebook Page so I can see. 😀